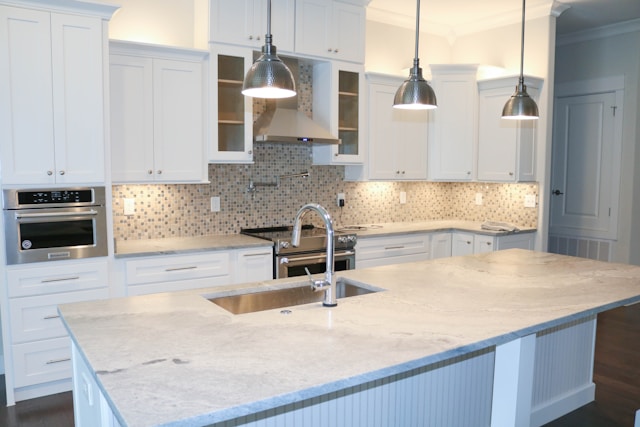
Granite countertops bring a touch of timeless elegance and unrivaled durability to any kitchen or bathroom. However, achieving a seamless and professional-looking installation goes beyond just picking a beautiful slab. Proper gluing techniques are critical for ensuring your DIY granite project delivers stunning results that will last for years to come. By understanding and avoiding a few common mistakes, you can confidently tackle your granite installation like a pro.
Mistake #1: Choosing the Wrong Adhesive
Don’t make the mistake of thinking any super-strong glue will do the job. Adhesives specifically formulated for granite are essential to ensure a secure and long-lasting bond, whether you’re joining countertop sections or installing a dishwasher mounting bracket for granite. Look for terms like “non-staining” and “high strength” on the packaging to guarantee the adhesive won’t cause discoloration to your beautiful countertops.
There are two main types of granite adhesives: epoxy and silicone-based. Epoxies typically provide the strongest and most rigid bond, making them ideal for most granite applications. Silicone-based options offer more flexibility, which could be useful in areas where slight movement might be expected. Consider the specific needs of your project and choose the adhesive that best suits those requirements.
Mistake #2: Skipping Surface Preparation
A strong bond starts with clean, smooth surfaces. Before applying the granite glue adhesive, thoroughly clean the areas to be joined using a solvent appropriate for stone (your granite supplier can advise). Acetone is commonly suitable but always test it on an inconspicuous area of your granite first. If necessary, lightly sand the surfaces with fine-grit sandpaper to remove any bumps or residue. Then, wipe it down again and ensure that the surfaces are completely dry before proceeding.
Pay close attention to the manufacturer’s instructions for your chosen adhesive. Some epoxies perform better if the surface has a slightly rough texture; light sanding could enhance the bond significantly. Always follow the guidelines closely for the best results.
Mistake #3: Neglecting Proper Clamping
Even the strongest granite glue adhesives need help to create the perfect bond. Consistent and adequate clamping pressure during the drying process is crucial. Don’t just throw a few weights on top and hope for the best! Use proper clamps designed for heavier materials, ensuring even pressure across the entire seam. Refer to the instructions for your chosen adhesive to determine the ideal clamping pressure and how long to maintain it.
Remember, some adhesives expand slightly while curing. Take this into consideration when clamping to avoid uneven drying that could affect the final result. For complex seams or larger sections, consider clamping in stages to keep the process manageable. Taking the time to do things right will prevent uneven surfaces and frustrating gaps within the seam.
Mistake #4: Ignoring Seam Alignment
Even with the strongest granite glue adhesive, a misaligned seam can ruin the sleek, high-end aesthetic of your countertop. Achieving that uninterrupted flow takes dedicated effort. Before applying any glue, visualize your desired final look and dry-fit the pieces multiple times. Utilize shims to ensure the sections sit perfectly level, and consider using a straightedge laid across the seam to guarantee alignment throughout its entire length.
Don’t be afraid to clamp and unclamp as needed to make adjustments – this initial care will dramatically improve your outcome. Opt for a granite seam epoxy tinted to blend seamlessly with your countertop material. While misalignment might be less noticeable with patterned granite, those beautiful swirls will look their best when the sections flow together naturally.
Mistake #5: Not Protecting the Surrounding Area
No matter how careful you think you are, the chance of a glue or epoxy mishap remains high. Preparing your workspace beforehand can save you a major cleanup headache later. Line the area directly adjoining the seam with painter’s tape for narrow protection. If you’re working on a larger section of countertop, cover the broader work area in cardboard or plastic sheeting to catch overspill.
Keep paper towels and the recommended cleaning solvent for your adhesive within easy reach – speed is essential for addressing those inevitable drips! Consider wearing disposable gloves for quick cleanup and to protect your hands from the adhesive. Taking these simple precautions allows you to focus on getting the bond right instead of stressing about potential collateral damage to your floors and cabinets.
Conclusion
By steering clear of these common mistakes, you’ll be well on your way to achieving a stunning and durable granite countertop installation. Always prioritize careful planning and attention to detail. Read the instructions for your chosen granite adhesive closely, focusing on the recommended surface preparation, clamping techniques, and cleanup procedures. If you encounter any unexpected challenges, don’t hesitate to reach out to reputable suppliers of granite tools and supplies for guidance. They can be a valuable resource, especially when tackling projects like installing a dishwasher mounting bracket. With a little preparation and the knowledge gleaned from avoiding these pitfalls, your DIY granite project can be a source of satisfaction for years to come.